How Long Does a Product Take to Get Uploaded on Gumroad
Does the idea of selling eBooks online freak you out at all?
Yous know that eBooks can be a neat source of passive income for your business. Perhaps you already have some awesome ideas for an eBook, or even take a finished eBook gear up to sell.
But getting that eBook out at that place can seem daunting. How practise you accept online payments for the book? Do you demand to set a PayPal account? An internet merchant account? How do you lot go along people's menu details rubber? How do you lot deal with accounting, taxation, and credit card fraud issues? And once shoppers have paid for your book, how exercise y'all deliver it to them automatically?
So many headaches. And a few years ago, you would have had to deal with them all yourself. Simply not whatsoever more than!
Thank you to amazing internet tools like Gumroad, you lot no longer have to worry nigh any of these problems. In fact, with Gumroad, you can make your eBook available for purchasing and downloading in just 30 minutes!
Want to know how it's done? You've come up to the right place. By the time you've read this tutorial, you lot'll have your eBook up for sale on Gumroad and linked from your own website. In one-half an hour's fourth dimension, you'll be gear up to take orders for your book.
Ready to brand some money? Let's go!
Why Gumroad is a neat choice for selling eBooks
Gumroad makes it ridiculously piece of cake for anyone to sell eBooks and other digital products. It handles the entire sales process for your eBook, from secure payment through to digital delivery of your PDF file and depositing the gain into your bank account. Then all you have to worry nearly is what to spend your earnings on!
Some other major headache for anyone selling digital products to consumers in Europe is how to handle VAT (European sales revenue enhancement). If you sell a digital product directly to European Union consumers — even if you lot're not in the Eu yourself — so y'all're supposed to:
- Register for VAT in an European union country (such equally the UK)
- Collect details on each consumer's location
- Accuse VAT on your sales, where appropriate (and at dissimilar rates for different European union countries!), and
- Pay the VAT to the taxation say-so in the country you registered with.
Needless to say, this can be a major hurting in the backside, peculiarly for the solopreneur or pocket-size business.
Fortunately, with Gumroad, this isn't a trouble at all. From a taxation signal of view, Gumroad supplies your eBook to your customers, not you. This means that Gumroad handles all the VAT stuff for you. Nice!
What else can y'all sell with Gumroad?
While this tutorial shows you lot how to sell an eBook, there are tons of unlike production types that y'all can sell on Gumroad, including:
- Music and videos (y'all tin can fifty-fifty upload several MP3 files per product to create albums).
- Subscription content, where people pay regularly for content that you email to them.
- Membership content, where people pay regularly for access to a content annal.
- Concrete products, such as CDs and T-shirts.
Gumroad fees
Nigh the only downside of using Gumroad is that they take a fairly hefty percent of the sale compared to, say, PayPal or an internet merchant account. However, if you desire an piece of cake, hassle-free style to sell your digital products so I'd say it's worth paying the college fees for the Gumroad experience.
You have two main options when it comes to fees (at the fourth dimension of writing):
- Pay no monthly fee, and pay 8.5% + 30 cents per sale.
- Pay a $10 monthly fee, and then pay 3.5% + 30 cents per sale. You likewise get some other perks, such as removing the Gumroad branding from your sales emails, custom product delivery options (so y'all can handle fulfilment yourself), and more.
Obviously, once you start selling more than a handful of eBooks per month, the $x/calendar month option is a good mode to go! For case, if you lot sell fifty eBooks a month at $20 each, you'll exist paying $100 per calendar month with the first pick, and $lx per month with the 2nd.
It's worth pointing out that the $x/month selection is for up to 1,000 unique customers per year. If you have more than customers then the monthly price goes up appropriately.
Now that you know the pros and cons of Gumroad, you're ready to start selling your first eBook! The post-obit steps show you how it'south done.
Allow's start selling!
Step 1: Sign up for Gumroad
Signing upwards is gratuitous and easy.
Visit https://gumroad.com/ and click the Commencement selling button. Then enter your email accost and a password, and click Create account. You tin can also use Facebook or Twitter to sign up if you adopt:

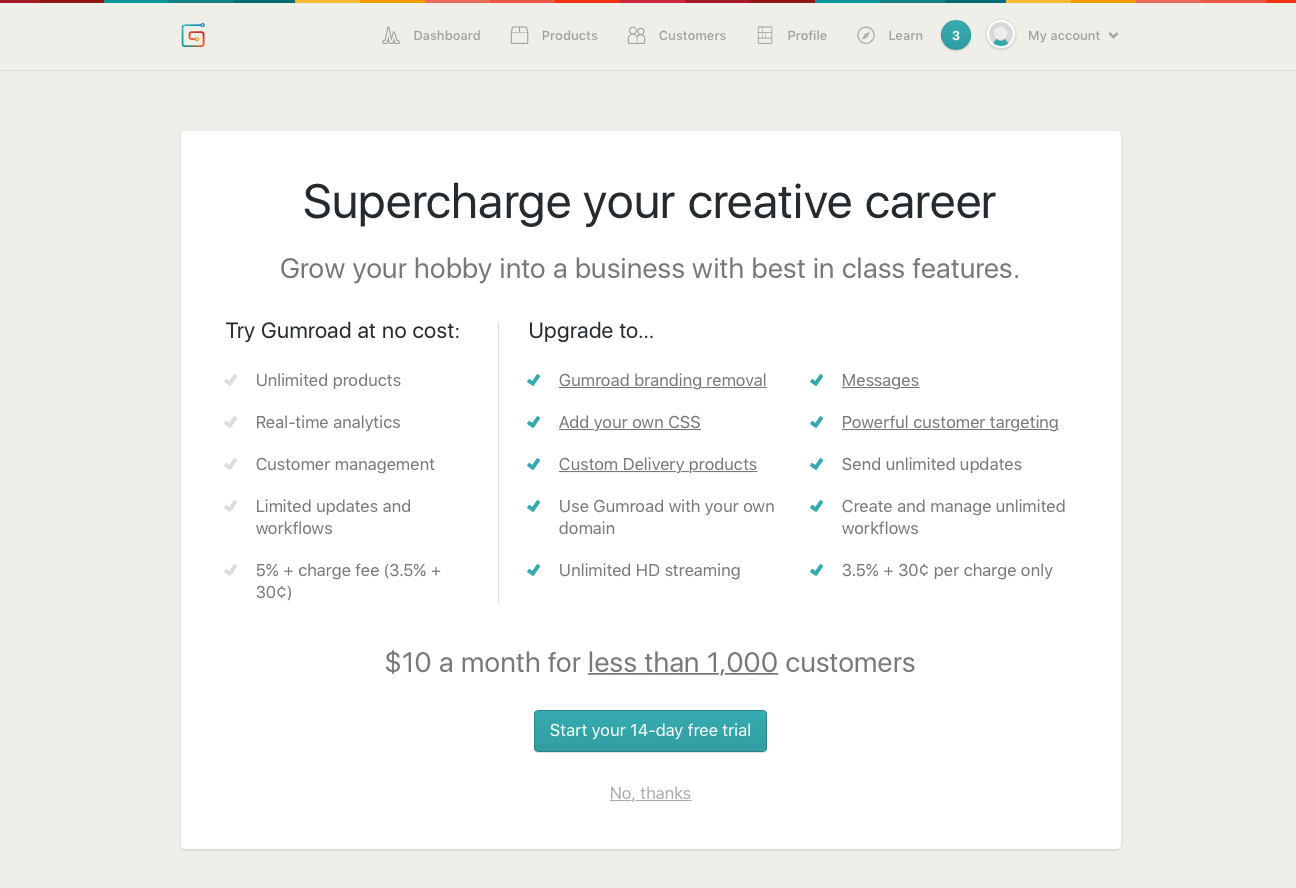
In one case you've signed upward, you're given the option to upgrade to the $10/calendar month programme with the lower transaction costs (see "Gumroad fees" earlier in this article). For now, click No, thanks. You tin always upgrade later at the click of a button:
Next, Gumroad asks y'all to enter some basic data most yourself and the product you desire to sell. Choose your options from the drib-down menus. In the "What are you working on?" section, click Volume or Comic. Click the Go along button when yous're done:

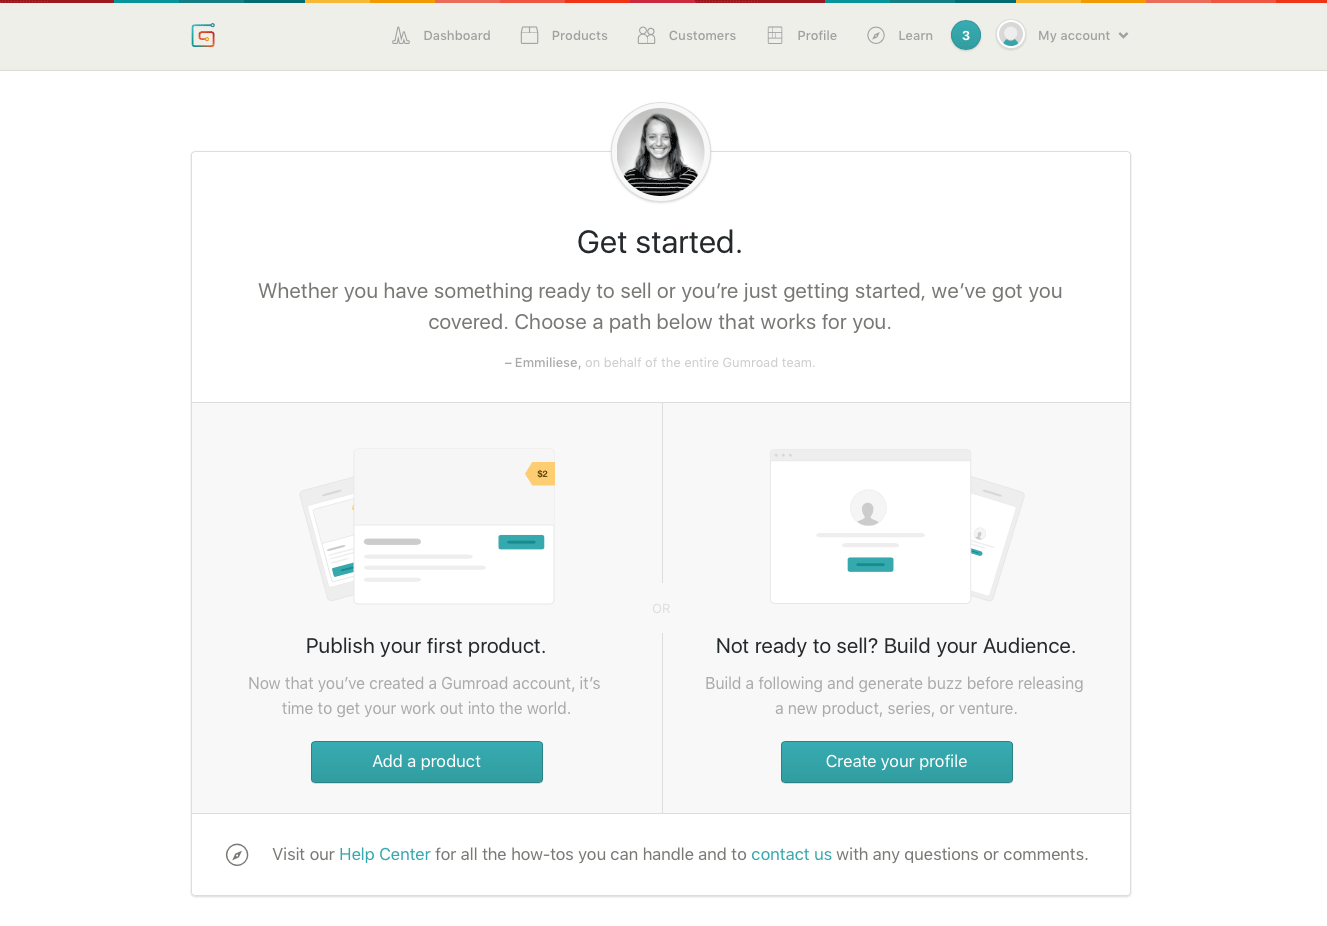
You'll now see a "Get started" page. Since you're gear up to publish your eBook, click the Add a production button to proceed:
Step ii: Add together your production
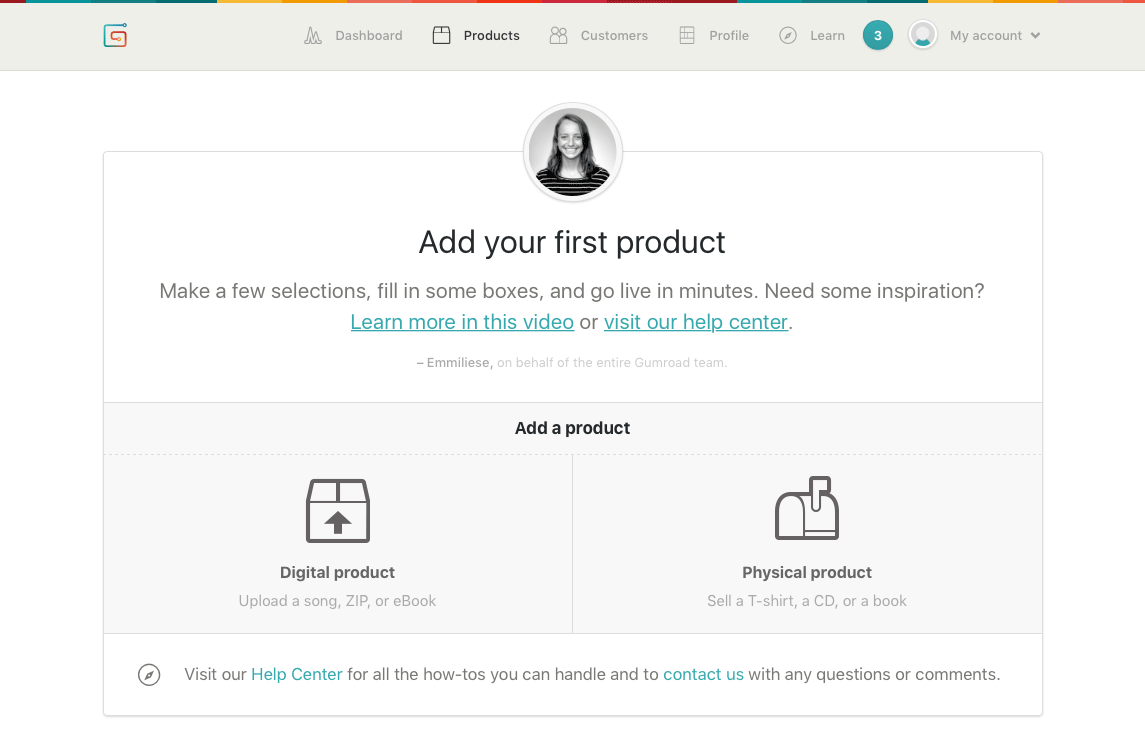
Gumroad now walks you through the steps for adding your first production. Click the Digital product button, since you'll exist selling an eBook:
Now you lot can cull how yous want to sell your eBook by clicking 1 of three buttons:
- Product lets you first selling your eBook immediately.
- Subscription lets y'all gear up up recurring payments for your production. This is great if you're selling access to a membership area, for example.
- Pre-order lets you start taking orders before your production goes on sale.
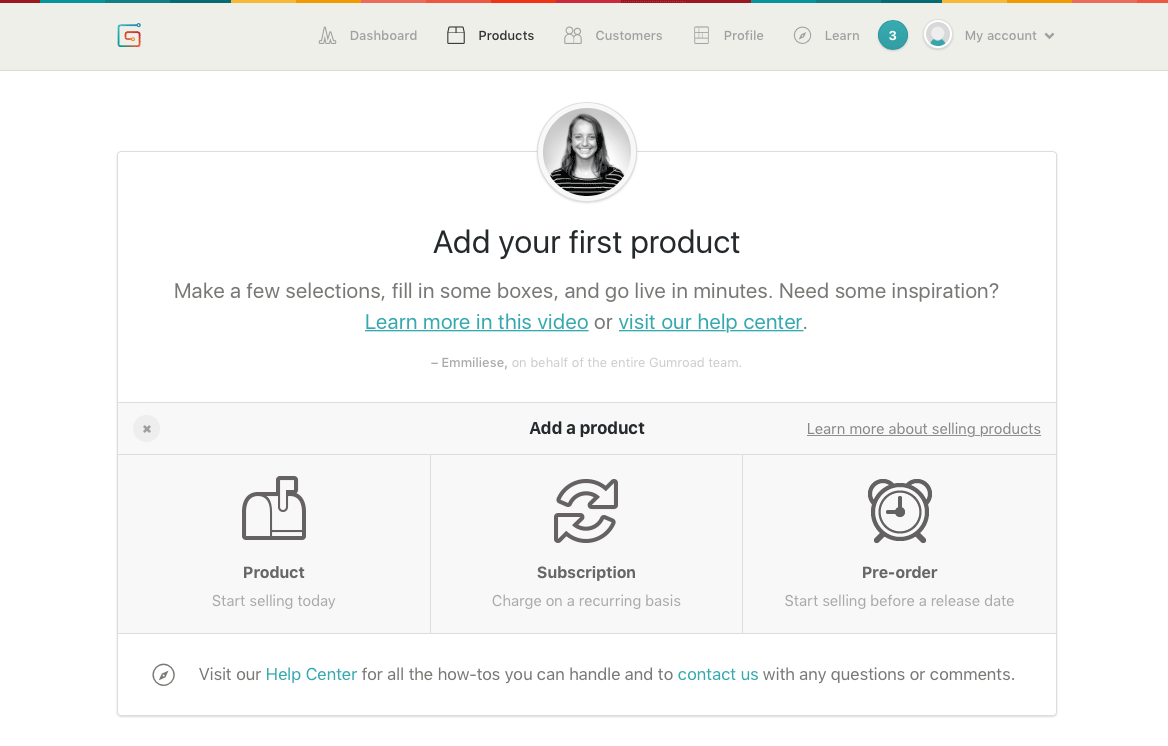
Since you already have an eBook to sell, click the Product button to continue.
At present comes the fun flake: adding your product! Follow these steps:
- Enter the production name.
Enter the title of your product in the Proper noun of product box. This proper name will appear wherever your production is offered for sale on Gumroad or your own site. - Set the price.
Enter the toll in the box next to the Name of product box. Yous tin can enter any price from $0.99 up to $v,000. You lot tin can too click the currency symbol to select a different currency. - Upload your PDF.
Click the Choose your files button, and cull how you'd like to upload your PDF file. For example, to upload your file from your computer, click From computer, then select your file to upload. Wait a few seconds while your file is uploaded.
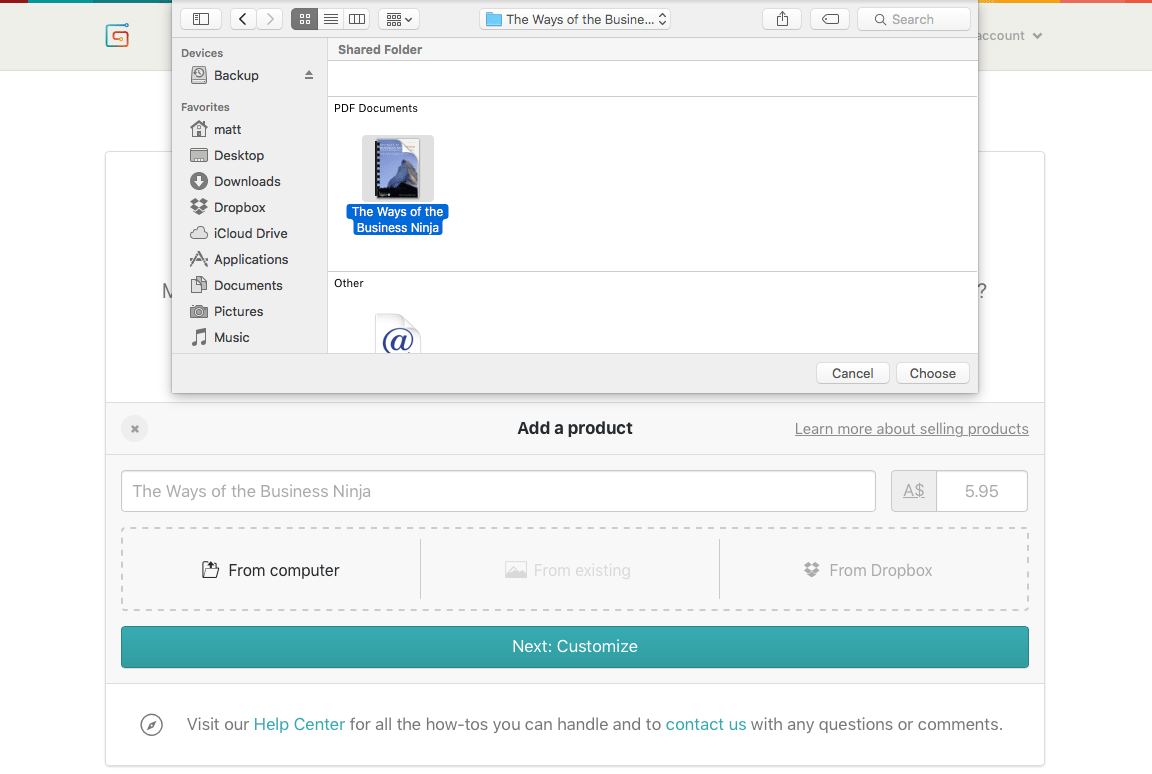
Yous can change the product name, price, and file after if you wish. Watch out, though: In one case yous've set the currency for this product, you tin't change information technology afterwards!
When you're washed, click the Next: Customize button to continue to the next folio.
Stride iii: Add a cover image and description
On this page, yous get to upload a cover image for your product, as well as enter a description.
Beginning by clicking the Upload a comprehend button, then choose a suitable image file on your computer. For an eBook, you'd usually use the same cover image that you put on the first page of your PDF file.
Adjacent, enter a description for your product in the Draw your product… box. This description appears beneath your product name whenever someone buys your eBook.
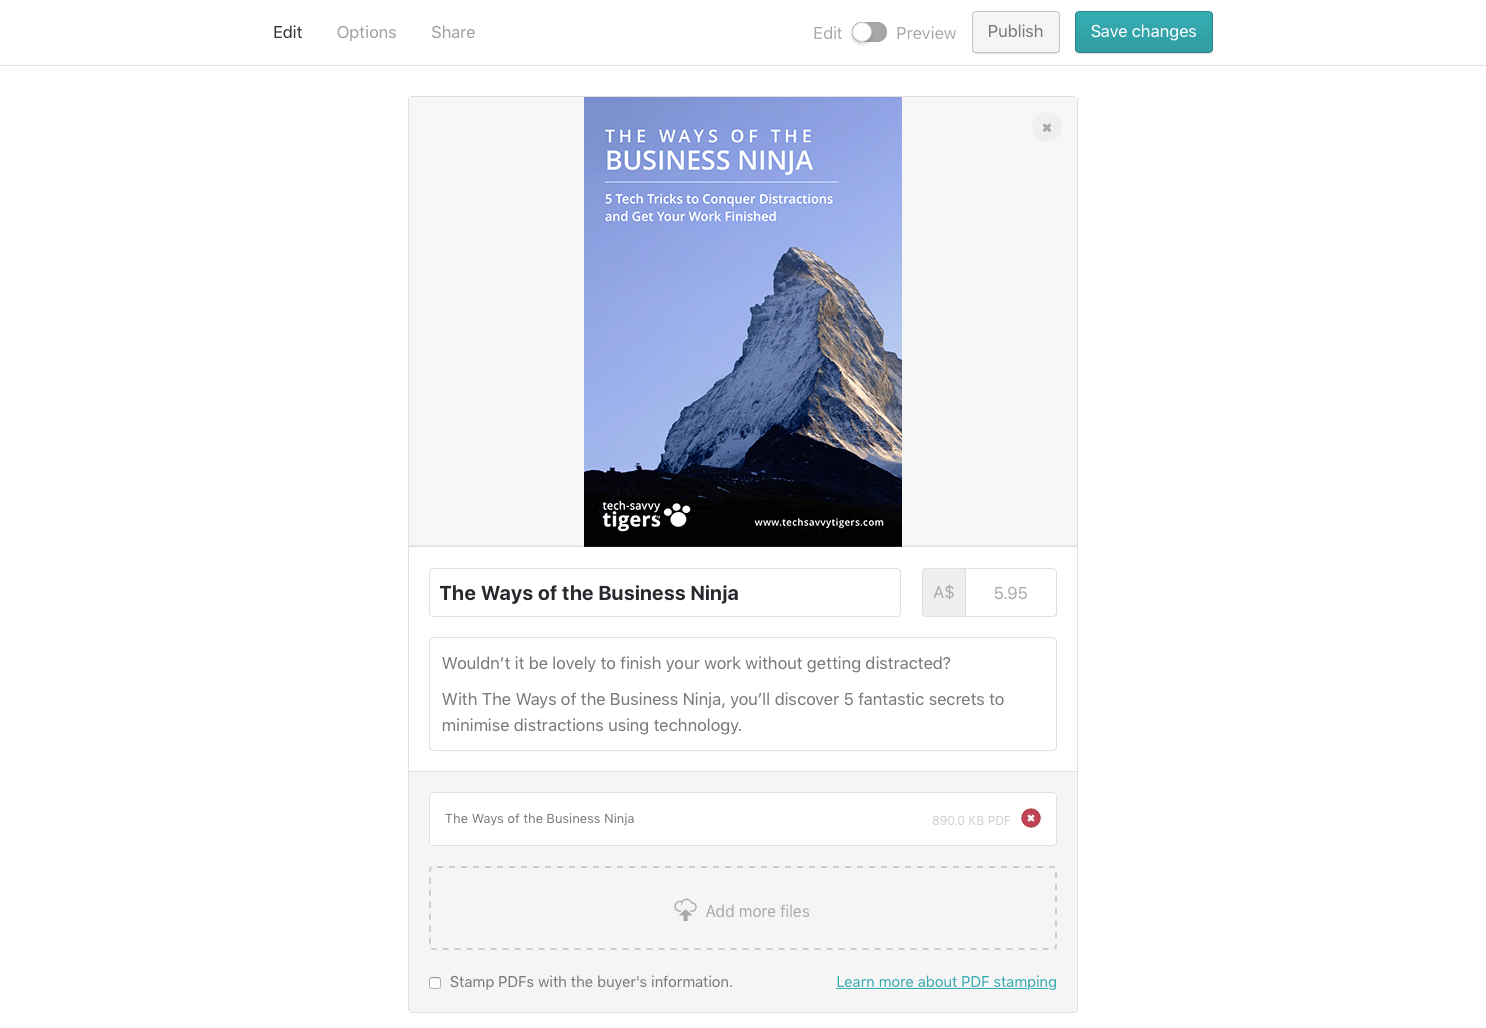
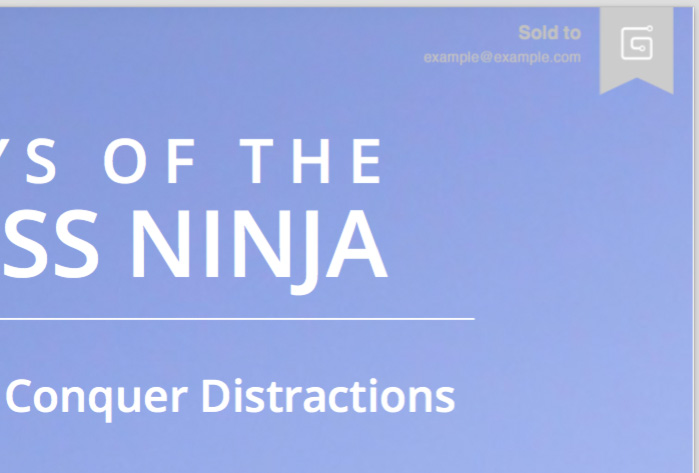
At the lesser of the page, there'due south a Stamp PDFs with the heir-apparent'due south information checkbox. If you select this option, Gumroad stamps a small message onto the first page of the heir-apparent's PDF that says "Sold to (buyer'south email address)". The thought is to discourage piracy. Nevertheless, if y'all find the message intrusive and y'all'd rather just trust people'due south honesty, then feel gratis to go out this option unchecked!
When you're happy with your cover image and clarification, click the Save changes button to add your production!
Stride 4: Preview and publish your product
Your product is saved, but it's nevertheless in draft class. Earlier you publish it, y'all can preview it to see how information technology will await to your buyers.
To do this, but click the Edit/Preview switch at the top of the page to alter the switch from Edit mode to Preview mode:
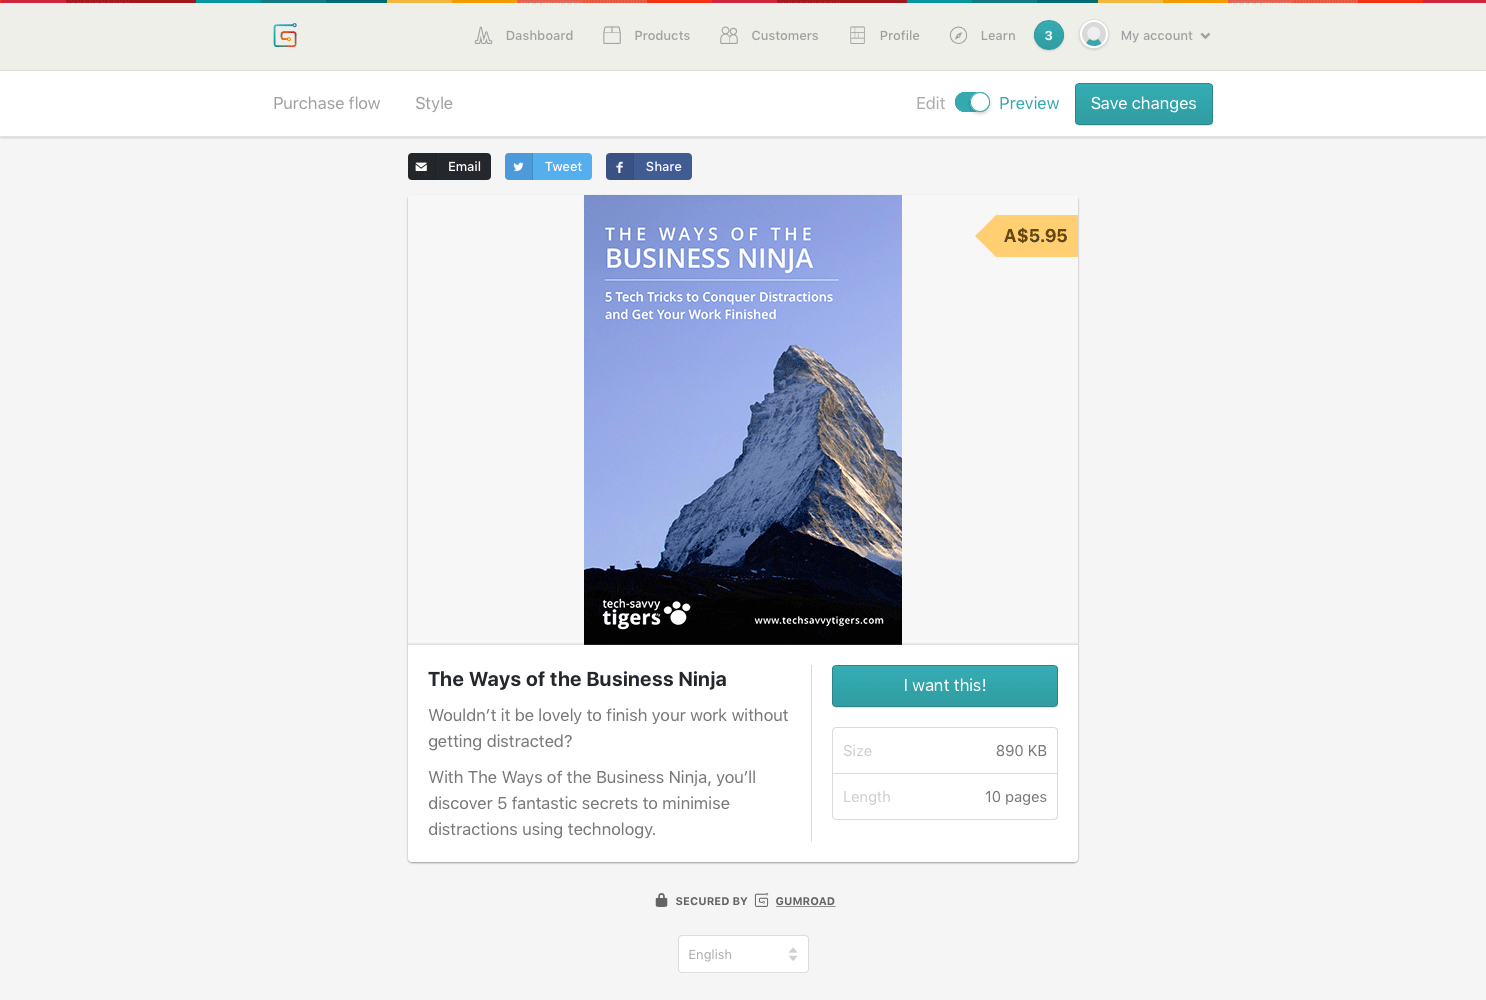
This shows you how your production appears when someone clicks the "buy" push button on your site.
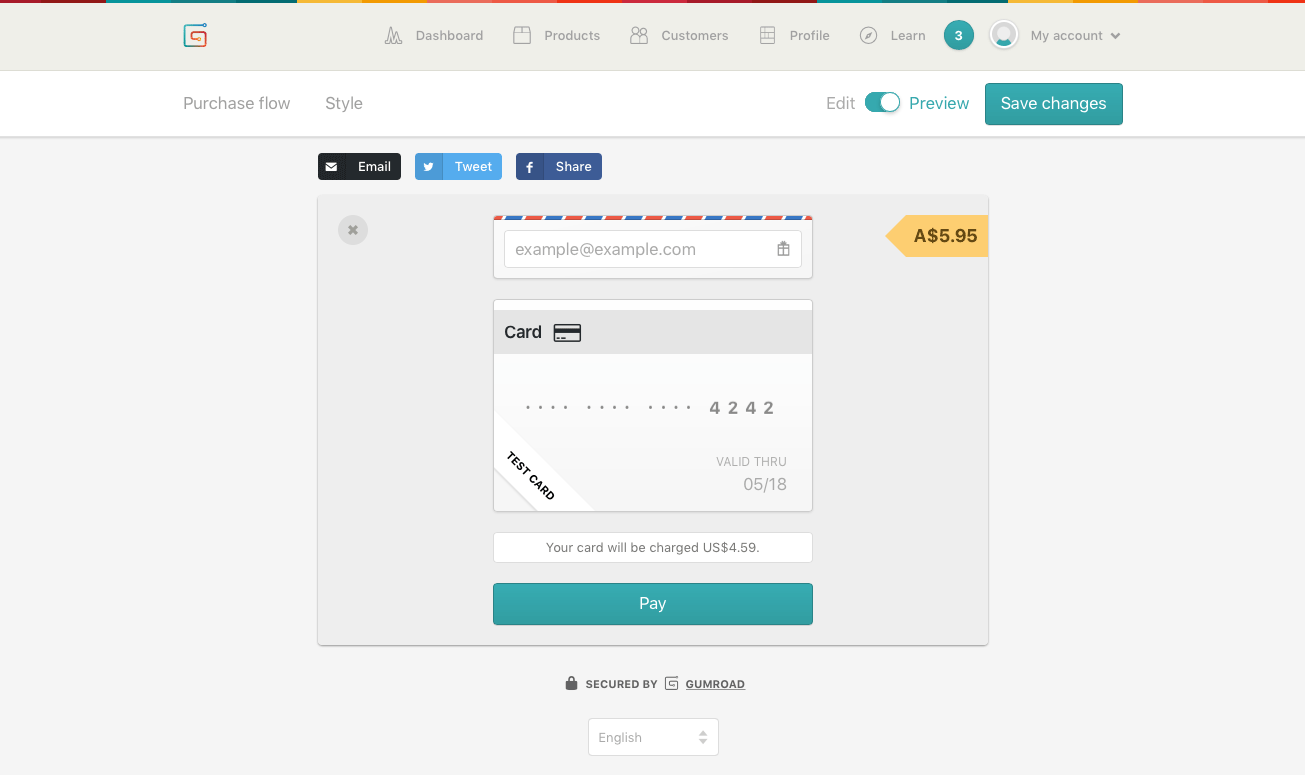
Yous tin can even preview the whole payment process from here. Click the I want this! button to reveal the payment form (using a test credit bill of fare), then click the Pay button:
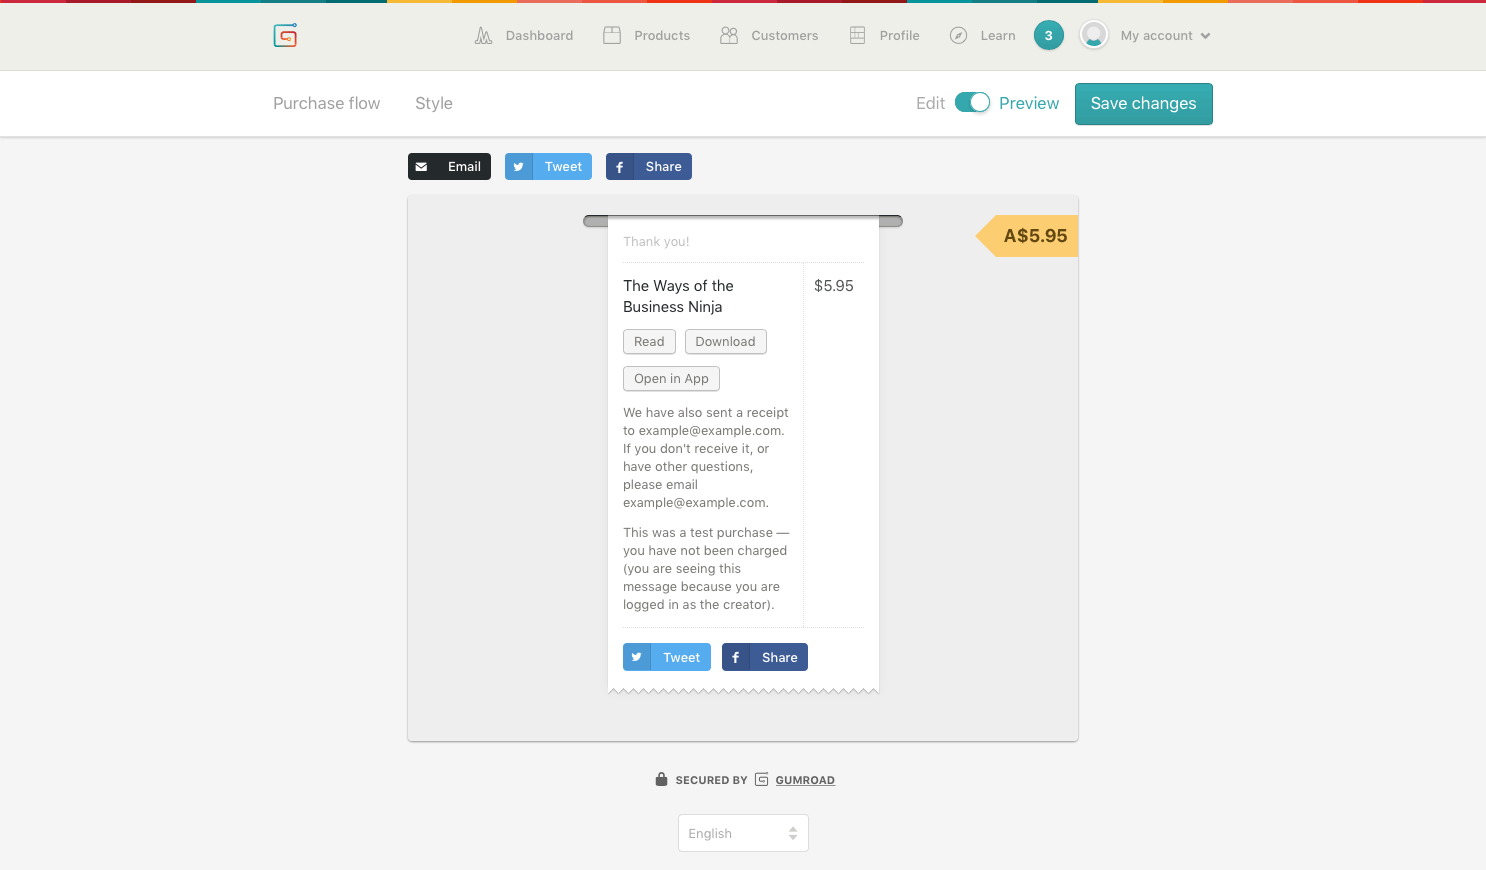
You'll then "buy" your eBook (don't worry, you won't exist charged). A receipt appears, from which you tin can choose to read the book online, download the book, or open the book in the Gumroad app:
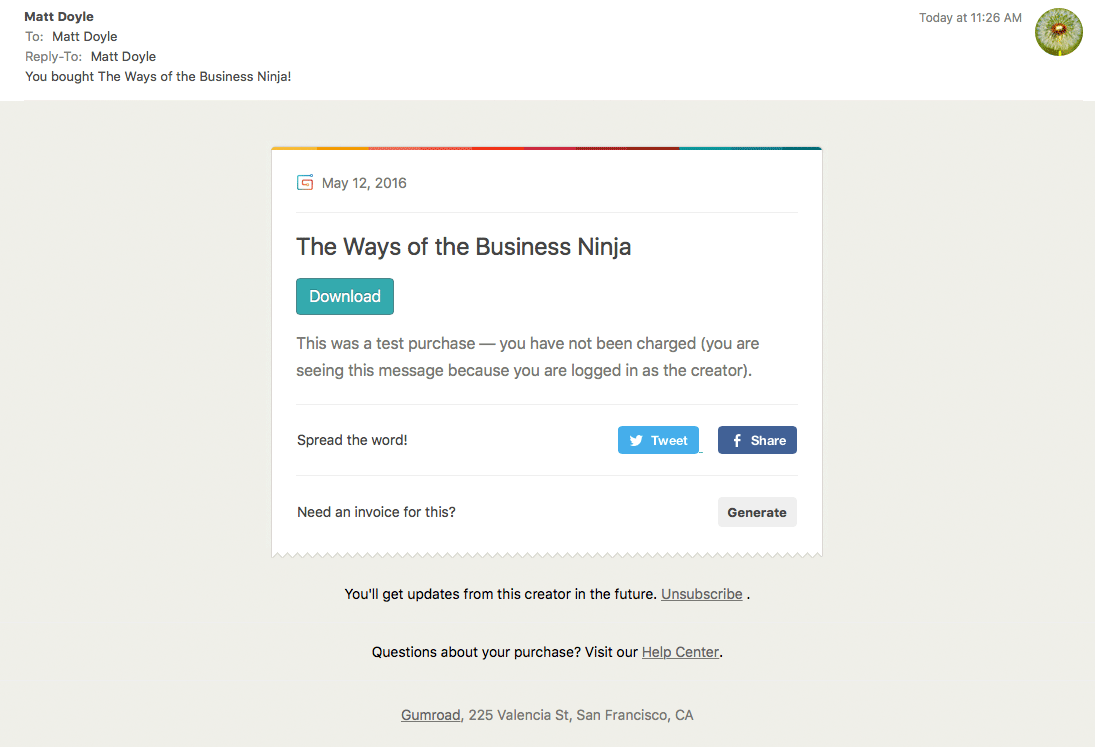
Gumroad too sends you a buy email, then y'all tin see what the emails will look similar to your customers:
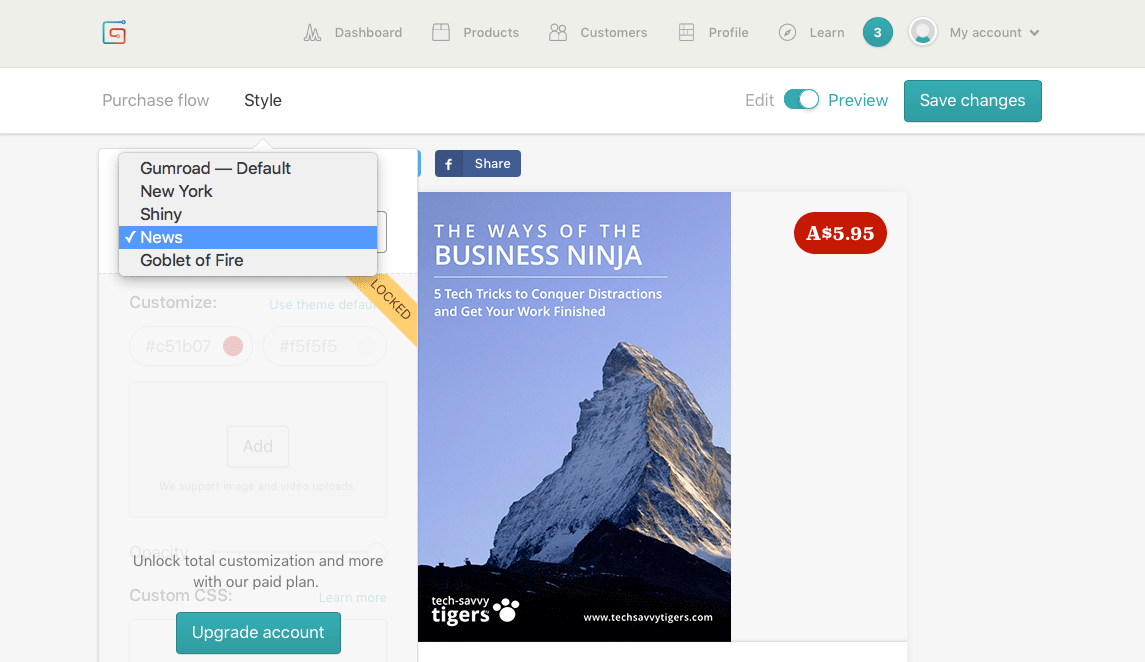
Past the mode, if you'd prefer a different await for your purchase page, click the Manner link at the summit of the Preview page. Yous can and then choose from five different themes to adjust your brand:
Once yous're happy with the way your product looks, click the Edit/Preview switch at the top of the folio to modify back to Edit way.
At present it's time to publish your book! Click the Publish button, and in the "Before you hit Publish" popup that appears, brand sure Book or Comic is selected. You can besides enter tags to classify your book (such equally Business organization or Productivity). These feed into Gumroad Detect — Gumroad'south recommendation engine — which can then recommend your volume to relevant buyers, so it's well worth doing:
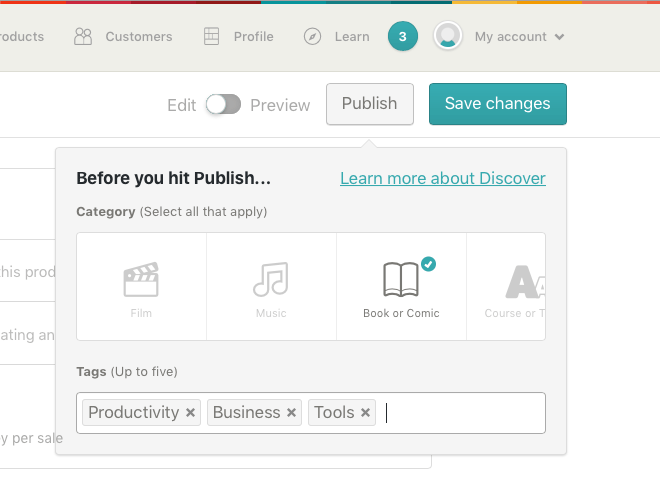
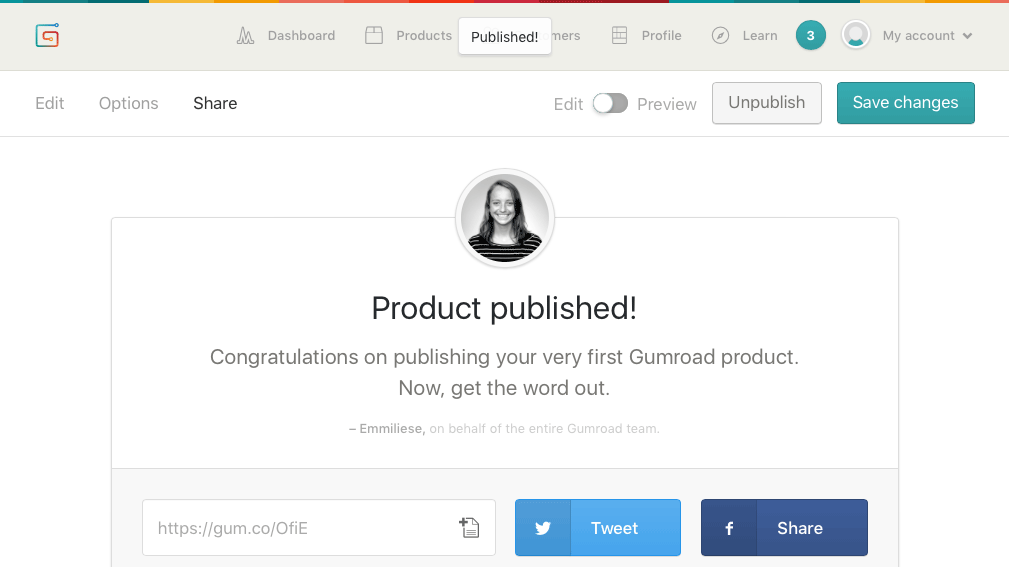
Once you've entered your tags, all yous need to practise is click the Publish button again to publish your eBook. Your book is at present available for purchase. High-fives all effectually!
Stride 5: Add your product to your website
Now that your eBook is published, y'all'll probably want to offer information technology for sale on your ain website. As with everything else, Gumroad makes this process easy!
There are 3 main ways that you lot can put a Gumroad product up for sale on your site:
- Linking to the Gumroad product page for your eBook. Gumroad automatically creates a production page on its website where people tin can buy your eBook. You tin can but link to this page from your website.
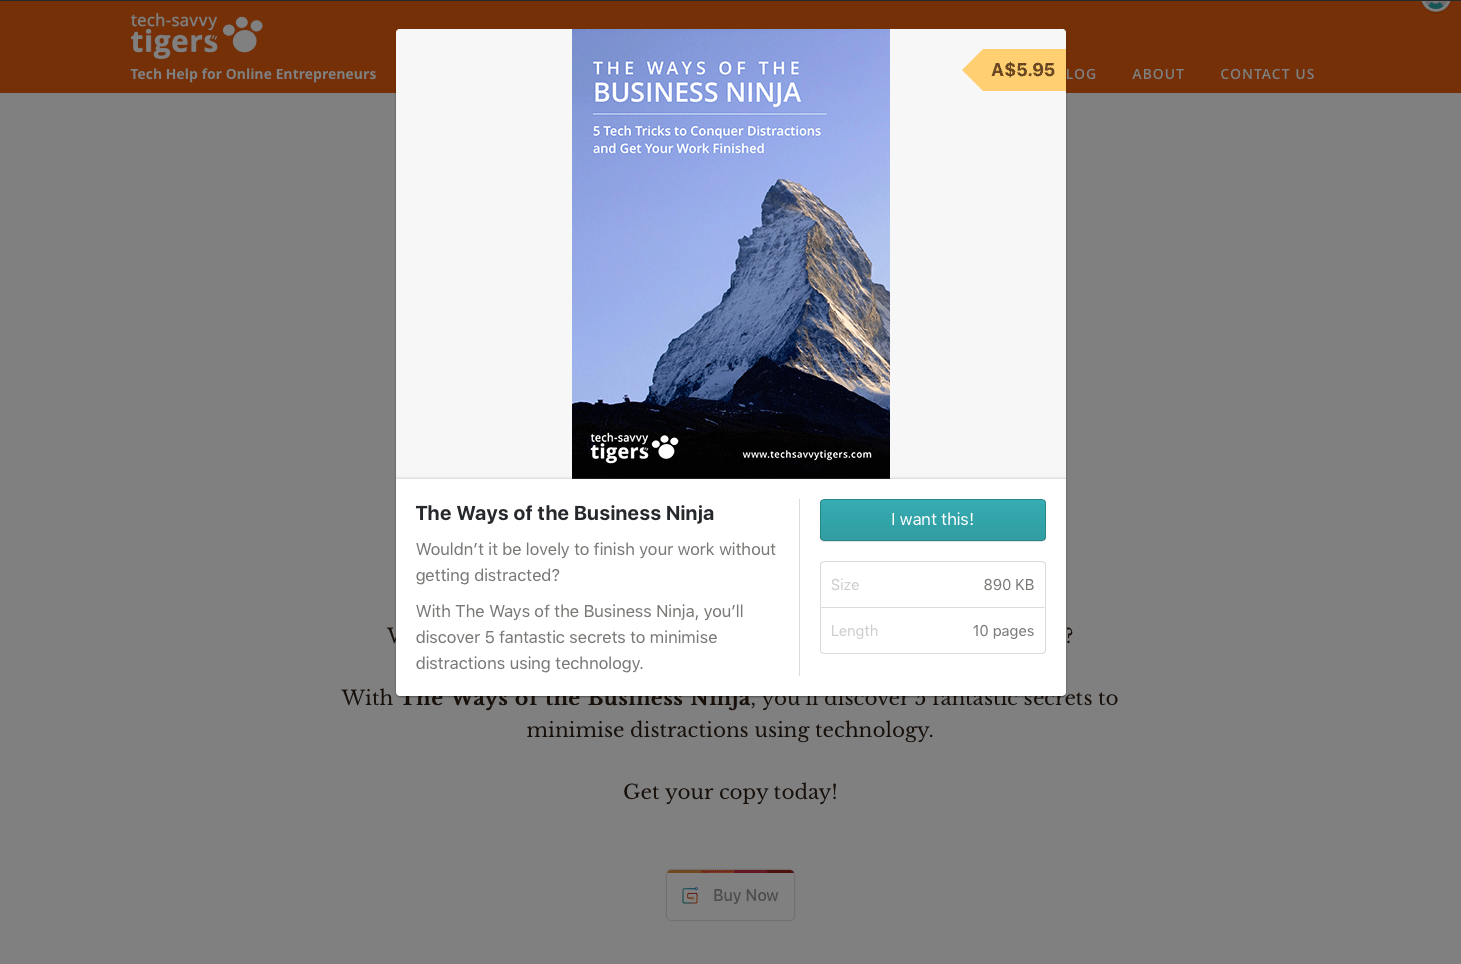
- The Overlay widget adds a "Purchase At present" push to a page on your site. When a shopper clicks the push, a popular-upwards overlay appears in your folio. This window looks much like the preview you saw in Step 4. It shows your production embrace image, the product details, and an "I want this!" push button. The shopper clicks the push, enters their card details, and purchases your eBook — all from within the overlay in your page:
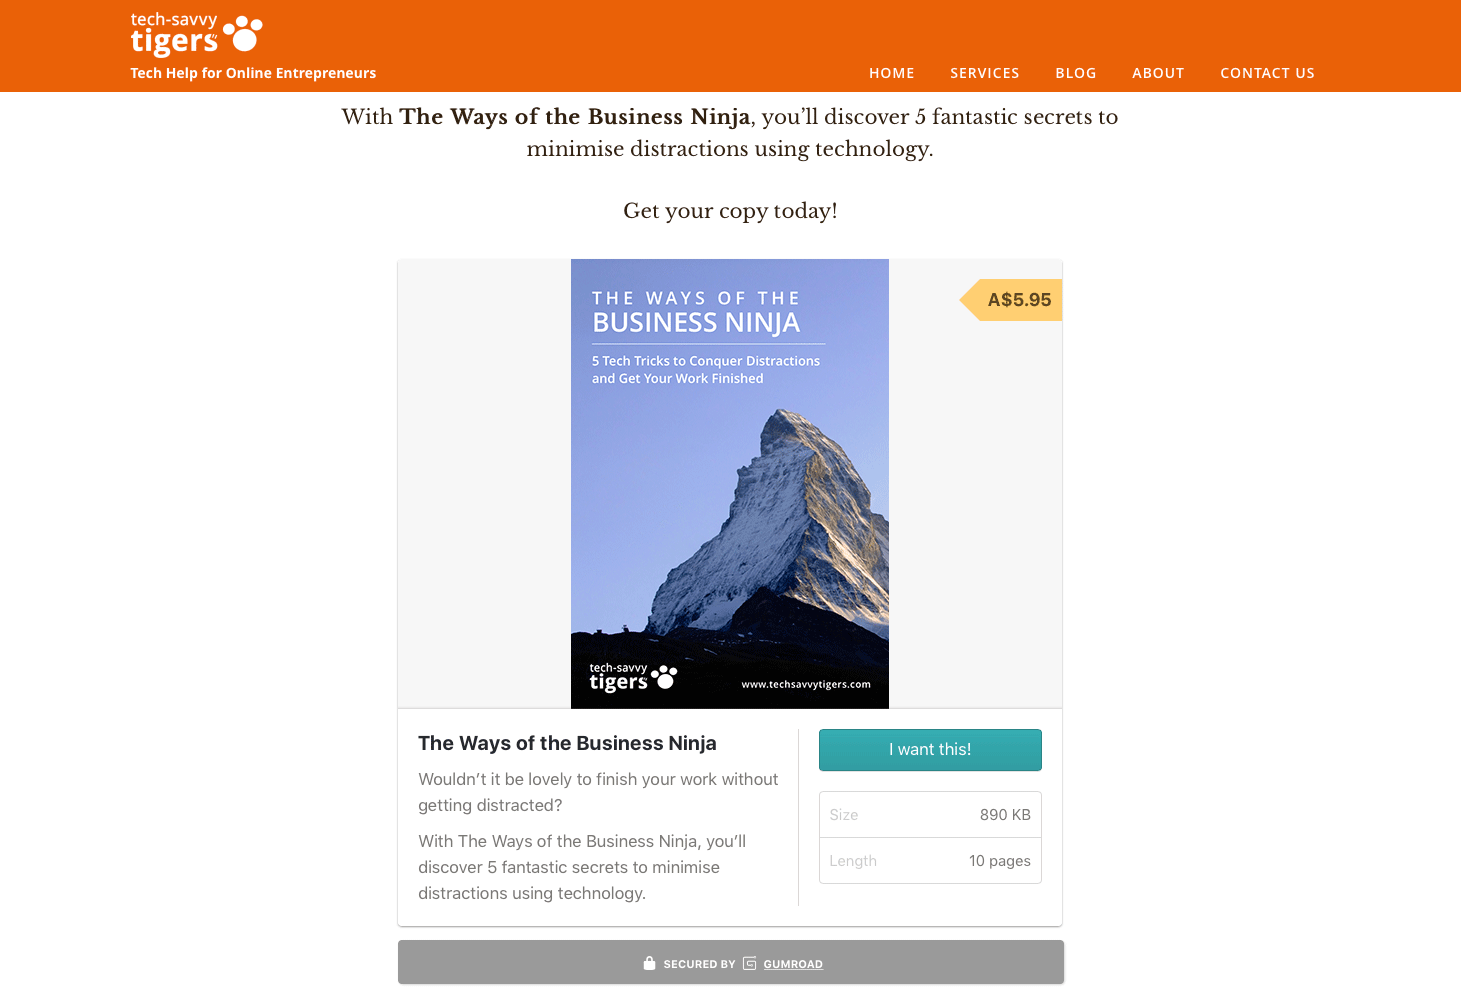
- The Embed widget is like to Overlay, except that it embeds the contents of the overlay — the comprehend prototype, product details, and "I want this!" push — directly in your page:
Which pick should yous choose?
All iii methods have their pros and cons:
- Linking is the easiest to set up upwards, since it doesn't involve adding code or plugins to your site. Yet, it takes the shopper away from your site and onto Gumroad's site. This can exist catchy if you'd similar shoppers to take other actions on your site after purchasing, such equally signing up for your listing. You lot can minimise this event past opening the Gumroad folio in a new tab (you'll see how to do this in a moment).
- The Overlay widget looks prissy; it's only an unobtrusive push in your page. At the time of writing, it's also the but way to allow shoppers to buy more than one product at once. However, overlays don't work on mobile phones; if yous're on a telephone then the button simply opens your product on the Gumroad site in a new browser tab.
- The Embed widget is slightly quicker to use than the Overlay widget, because shoppers don't have to click the offset "buy" button to view and buy your production. Information technology also works on mobiles. Even so information technology tin can likewise exist hard to make it blend in nicely with the rest of your folio design, and if you have more than 1 product in your folio then all those embeds tin offset to look rather unwieldy.
Furthermore, if you're selling products using the Gumroad Overlay or Embed widgets, you really should purchase and install a TLS (also known as SSL) certificate for your site, so that your pages can exist accessed using https:// instead of http://. Information technology can exist fiddly to prepare up, but it provides extra protection confronting hackers and also reassures your customers. The Gumroad site has a good page that explains how to set up a TLS certificate. (If you get stuck, ask your web hosting provider — they're usually pretty helpful with this sort of thing!)
Linking to your product from your site
For this tutorial, you'll utilize the linking method. It's piece of cake to prepare, and yous don't have to worry about getting a TLS certificate on your site.
Follow these steps to link to your Gumroad product page from your site:
- Discover the URL of your Gumroad product page.
Click the Products menu option in Gumroad to view your products, and so click your product to edit it. Click the Share tab. Your product page's URL is right at the acme: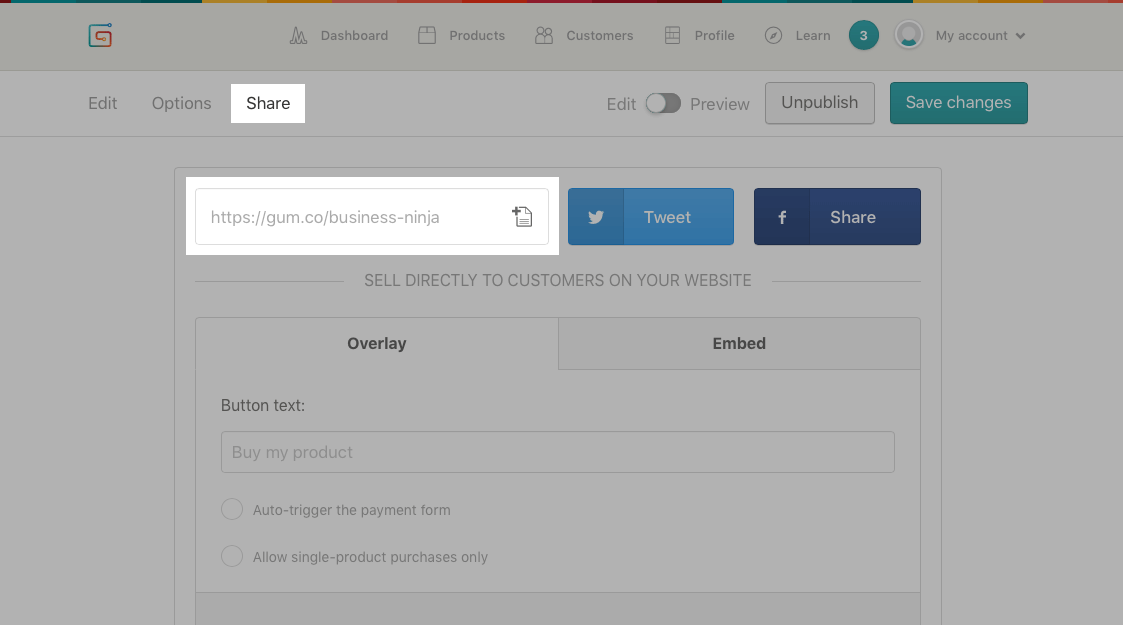
To link to your eBook'south Gumroad product page, start find the URL to link to in the Share tab. - Re-create the product folio URL.
Select the URL that you lot establish in Step 1. In nearly browsers you can do this by triple-clicking the URL (clicking it three times in a row). Now choose Edit > Copy in your browser's menu to copy the URL to the clipboard. - Insert the link in your webpage.
Edit your page in WordPress. Type the text or insert the image that y'all'd like to use for the link, and then select it. Click the Insert/edit link button in the editor'southward toolbar, so choose Edit > Paste in your browser's card to paste the URL into the link box: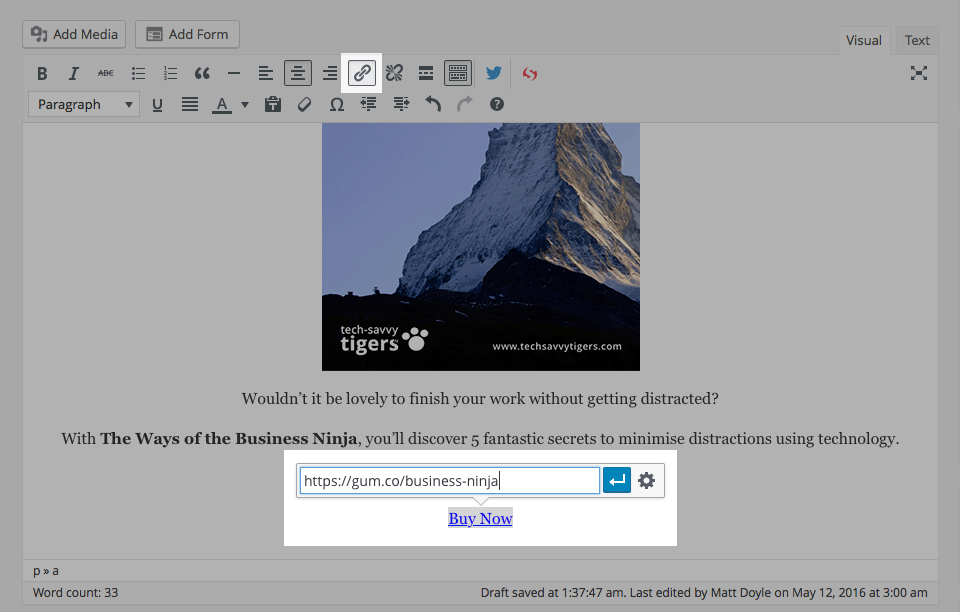
To add together the link in WordPress, select the text you desire to use for the link, and then click the Insert/edit link toolbar push button and paste in the URL. - Make the link open up in a new browser tab (optional).
Every bit mentioned earlier, one event with the linking method is that it takes shoppers away from your site and onto Gumroad. Yous tin go round this to some extent by opening the Gumroad page in a new browser tab, which keeps your page open in the original tab. To do this, click the petty "gear" icon in the WordPress link box (see the screenshot higher up) and, in the popup that appears, select the Open up link in a new tab checkbox. Click the Update push button to close the popup: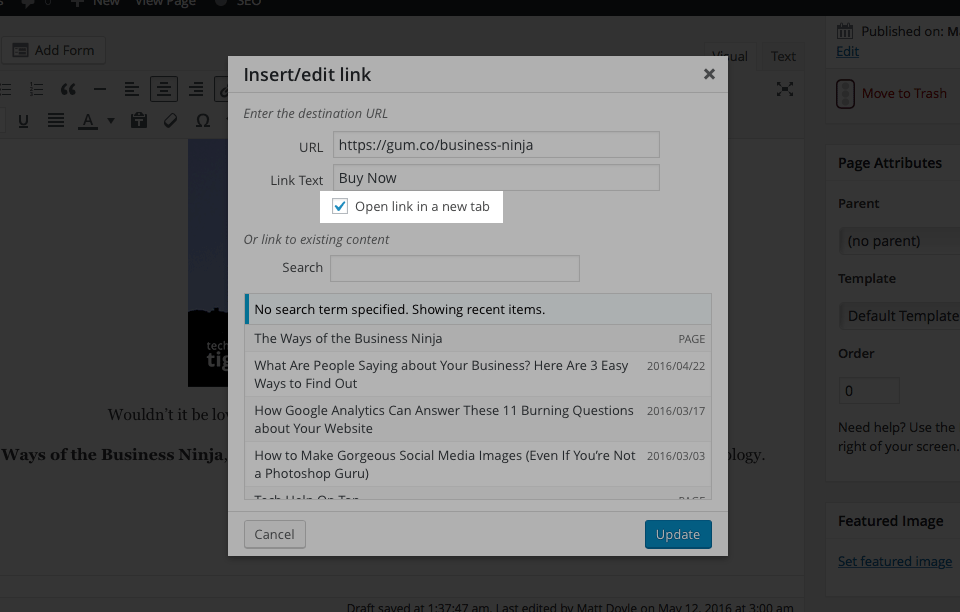
To make your Gumroad product page open in a new browser tab, select the Open up link in a new tab checkbox in WordPress.
Now press Return to save your link (if necessary). Salve your page and view information technology in your browser. Y'all should see the Purchase Now link in the folio; click information technology to open your product folio on Gumroad.
Linking with a push
Often yous'll want to link to your Gumroad product with a Buy Now button instead of a text link. There are several ways to practice this, but here are a couple of methods you tin can utilise:
- Add a
buttonclass to the link. Many WordPress themes include abuttonCSS form that styles a link as a button. To use this class, first create a text link equally described to a higher place. So click the Text tab in the WordPress editor to switch to the text editor. Observe the markup for your link, which will look something like this:<a href="https://mucilage.co/business-ninja">Buy Now</a>Now add together the text
class="button"only later the start of the<a>tag, like this:<a class="push button" href="https://gum.co/business concern-ninja">Purchase At present</a>Then save your page in WordPress and view it in your browser to see the effect. Here's how this push looks on our site:
Buy Now
- Add your own CSS to fashion the link as a button. If calculation the
buttongrade equally shown above doesn't accept any effect then your theme doesn't include the class. You could add information technology yourself past creating a child theme and adding apushclass to the stylesheet, merely if that all sounds a bit scary, here'south a "quick and dirty" solution! Find the markup for your link equally described above, and add the textstyle="padding: 15px; border-radius: 5px; background: #448844; color: #ffffff;"just afterward the start of the<a>tag, similar this:<a style="padding: 15px; border-radius: 5px; groundwork: #448844; color: #ffffff;" href="https://gum.co/business-ninja">Purchase Now</a>Feel free to tweak the
groundworkandcolourvalues to match your site's design. And so save your page in WordPress and open up it in your browser to encounter the upshot. Here's how this button looks:Purchase Now
Pace 6: Get paid!
Congratulations – your eBook is now for sale on your site. Make sure yous tell everyone. 🙂
The terminal footstep is to tell Gumroad how to send you your money! Hither's what you need to do:
- View the Payout page.
Click My account in the elevation-right corner of your Gumroad dashboard. In the drop-down menu that appears, click Settings. When the Settings page appears, click the Payout link near the height of the page: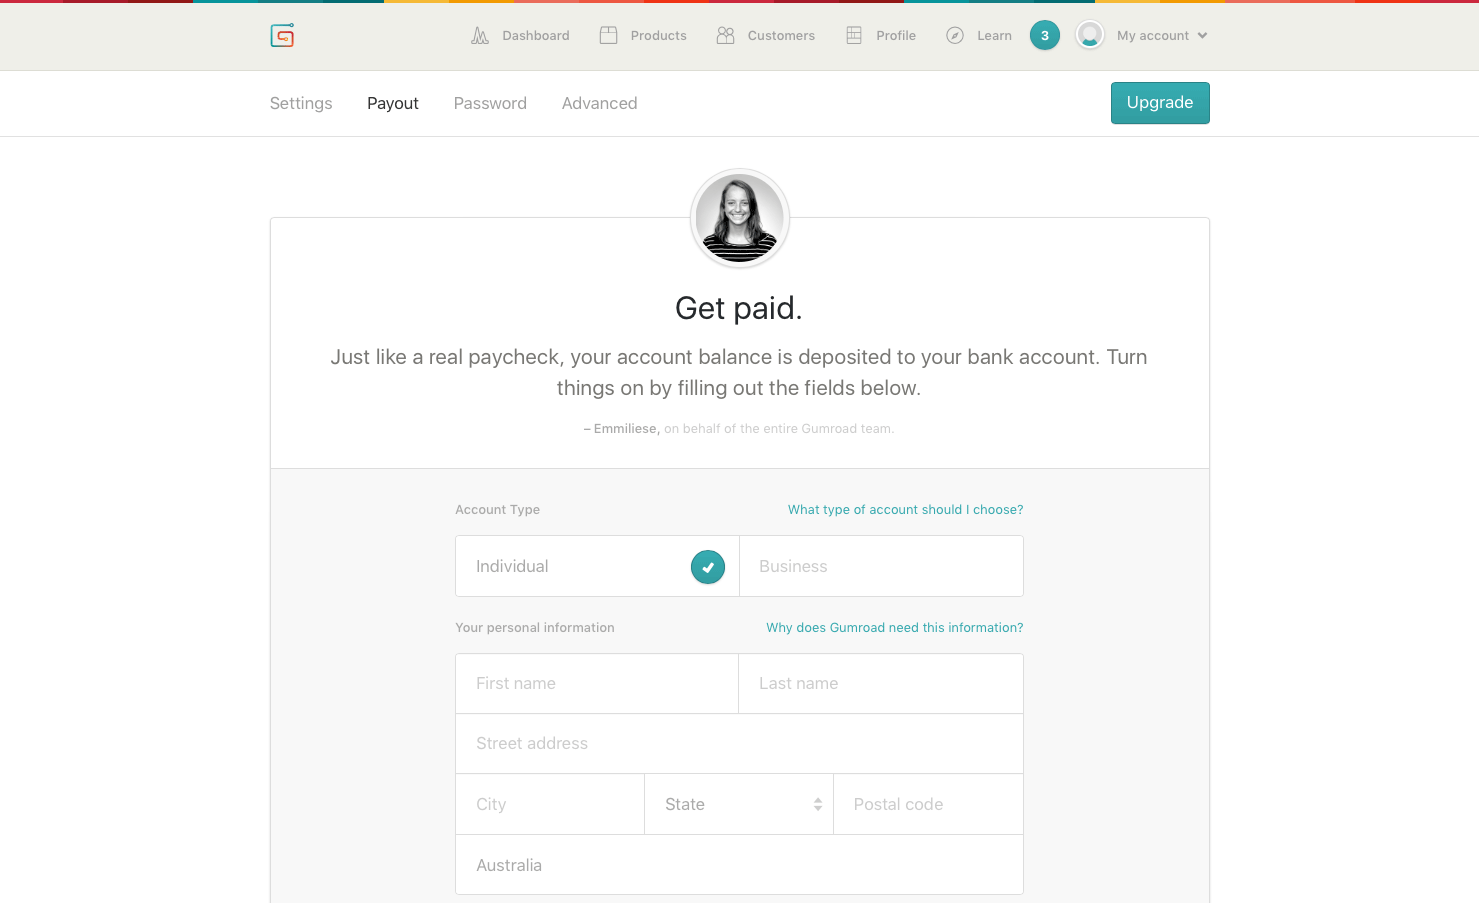
The Gumroad Payout page is where you lot enter your payment details. - Choose your business relationship type.
The Account Type option at the elevation of the class gives you two options: Private and Business. If you're registered as a business, fifty-fifty as a sole trader — for example, y'all have a US EIN (Employer ID Number) or an Australian ABN (Australian Business organisation Number) — so yous should select the Concern option. If you're just selling your eBook as a private individual, select the Individual selection. - Fill in your personal info.
This volition vary depending on your country of residence, as well equally whether you selected Individual or Business organization in Stride 2. Generally yous need to make full in your name, address and engagement of birth, as well as your business number (if applicative). - Enter your bank account details.
Finally, enter the details of the bank account where yous want Gumroad to send your money. (In some countries you'll need to utilise a PayPal business relationship instead of a banking concern business relationship.)
When y'all've filled in the grade, click the Finish button. You'll receive an email confirming that you added your depository financial institution account.
All done! Gumroad pays you every Friday. 🙂
Outset making coin now!
Selling eBooks tin can seem scary. Not only do you lot have to notice a way to accept payments safely online, but you also have to effigy out how to exercise digital delivery, and potentially deal with VAT bug besides!
With Gumroad, though, you don't accept to worry about any of that stuff. Gumroad handles it all for you. You simply upload your eBook, prepare a few options, add the product to your site, and tell Gumroad how to pay you. It couldn't be simpler.
And then what are you lot waiting for? Start selling your eBook today!
[Prototype credits: Reading an eBook by James Tarbotton (CC0), cropped, enhanced, blur]
Source: https://www.elated.com/sell-ebook-gumroad-30-minutes/
0 Response to "How Long Does a Product Take to Get Uploaded on Gumroad"
Post a Comment